

Setting up an iOS device to work with Burp Suite Community Edition
This guide will help you configure an iOS device to work with Burp Suite Community / Professional Edition. An iOS device can be used with Burp Suite to test web and mobile applications for security vulnerabilities.
Step 1: Setting up the Burp Proxy Listener
Instructions for configuring the proxy settings in Burp Suite Community Edition:
- Launch Burp Suite and navigate to the Proxy section, then select Proxy Settings.
- In the Proxy Listeners section, click the Add button.
- Within the Binding tab, specify the
Port as 8082(You can choose an alternative port if 8082 is in use). - Select the option for All Interfaces and click OK.
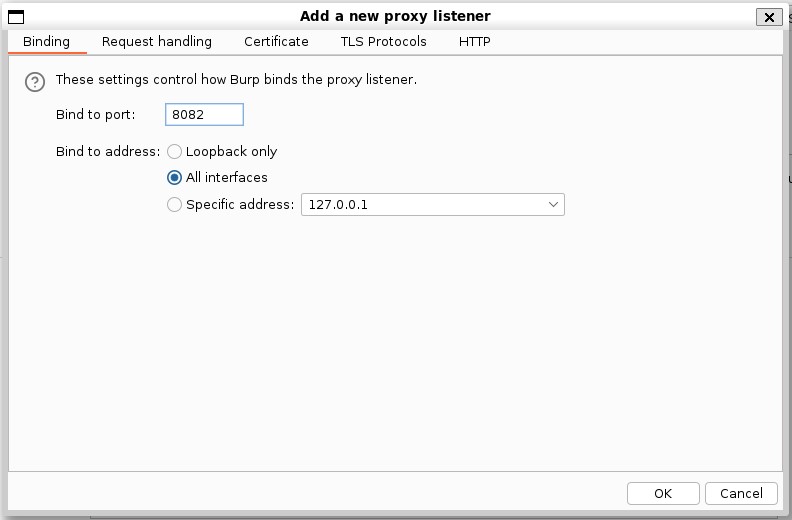
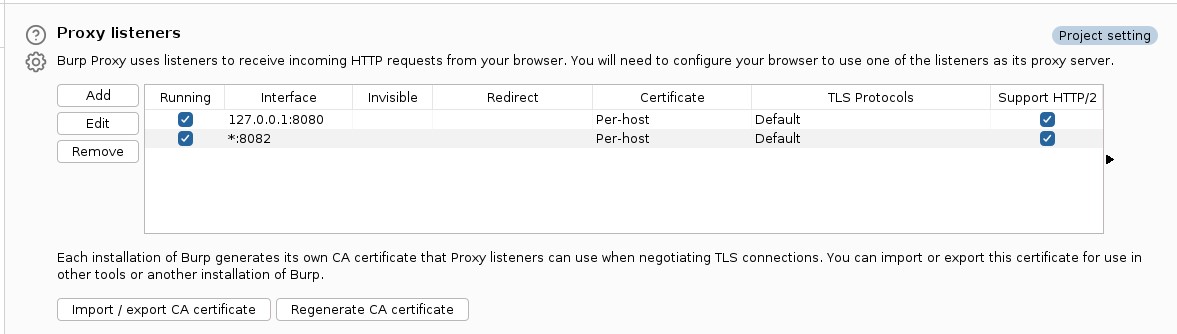
- When prompted, click Yes. Your Proxy Listeners settings should resemble the following:
Step 2: Configuring Your iOS Device for Proxy
Steps to set up proxy settings on your iOS device:
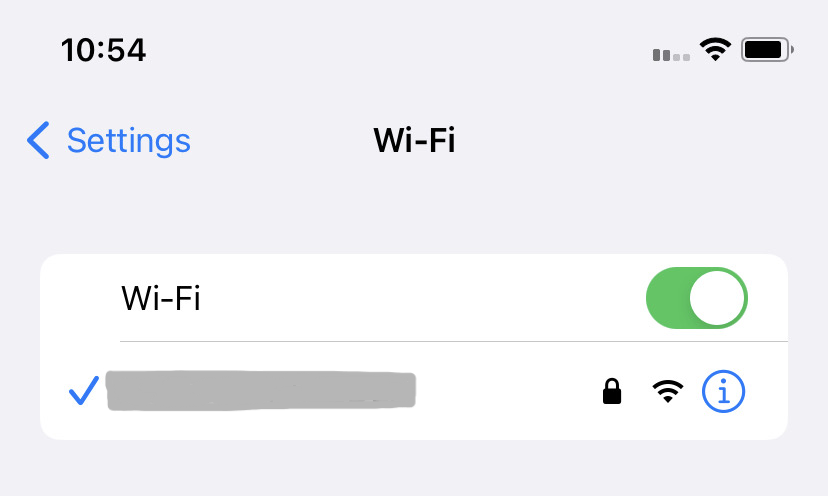
- On your iOS device, navigate to Settings > Wi-Fi.
- Ensure that your device is connected to your Wi-Fi network.
- Select the (i) icon next to your Wi-Fi network.
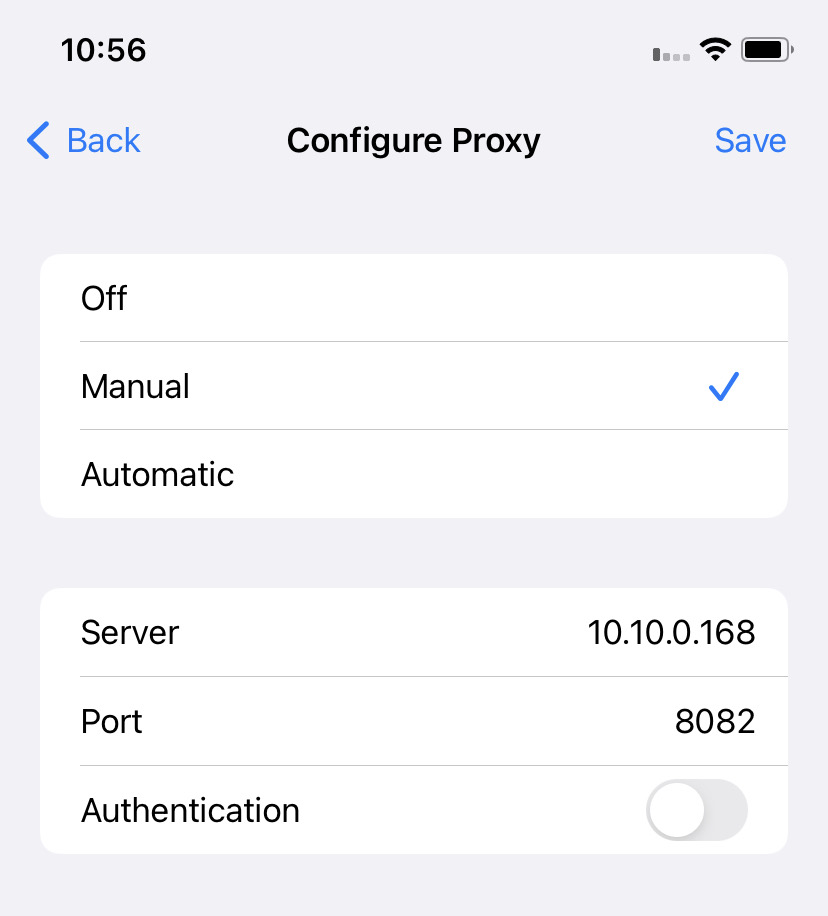
- Set the Configure Proxy option to Manual.
- Specify the Server as the IP address of the computer running Burp Suite Professional.
- Set the Port to 8082 or the port value you configured for the Burp Proxy Listener.
- Tap Save.
Step 3: Installing a CA Certificate on Your iOS Device
To enable interaction with HTTPS traffic, follow these steps to install a CA certificate from your Burp Suite Community Edition installation onto your iOS device:
To install the CA certificate on your iOS device:
- Ensure that Burp Suite is running on your computer.
- Use the browser on your iOS device to visit
http://burpsuiteand select CA Certificate.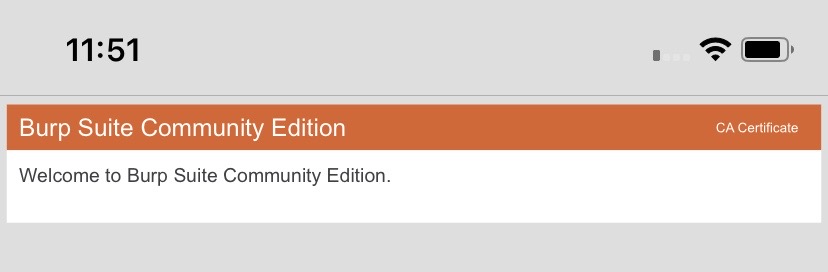
- Once the CA certificate is downloaded, go to the Settings menu and select Profile Downloaded.

- On the Install Profile screen, choose Install.
- On the Installing Profile screen, select Install.
- After the profile is installed, choose Done.
- Go to Settings > General > About > Certificate Trust Settings.
- Activate the toggle switch for
Portswigger CA.
Step 4: Verify the Configuration
Checking the Configuration:
- Launch Burp Suite.
- Navigate to Proxy > Intercept and click on Intercept is off to enable intercept mode.
- Open the web browser on your iOS device and visit an HTTPS web page.
- You should see the HTTPS request come through Burp Suite proxy.
The page should load without any security warnings.
Let us know if you want to know more about our mobile app pen-testing services.